aamarPay Payment Module Installation Guide for WooCommerce
This guide provides step-by-step instructions for installing and activating the aamarPay payment module for WooCommerce. The aamarPay module allows you to integrate the aamarPay payment gateway into your WooCommerce plugin.
Before You Begin
- Please ensure that you have access to the Admin Panel of your WooCommerce store.
- Ensure that you have downloaded the aamarPay payment module zip file.
Installation Steps
- Log in to your WooCommerce admin Panel using your admin credentials.
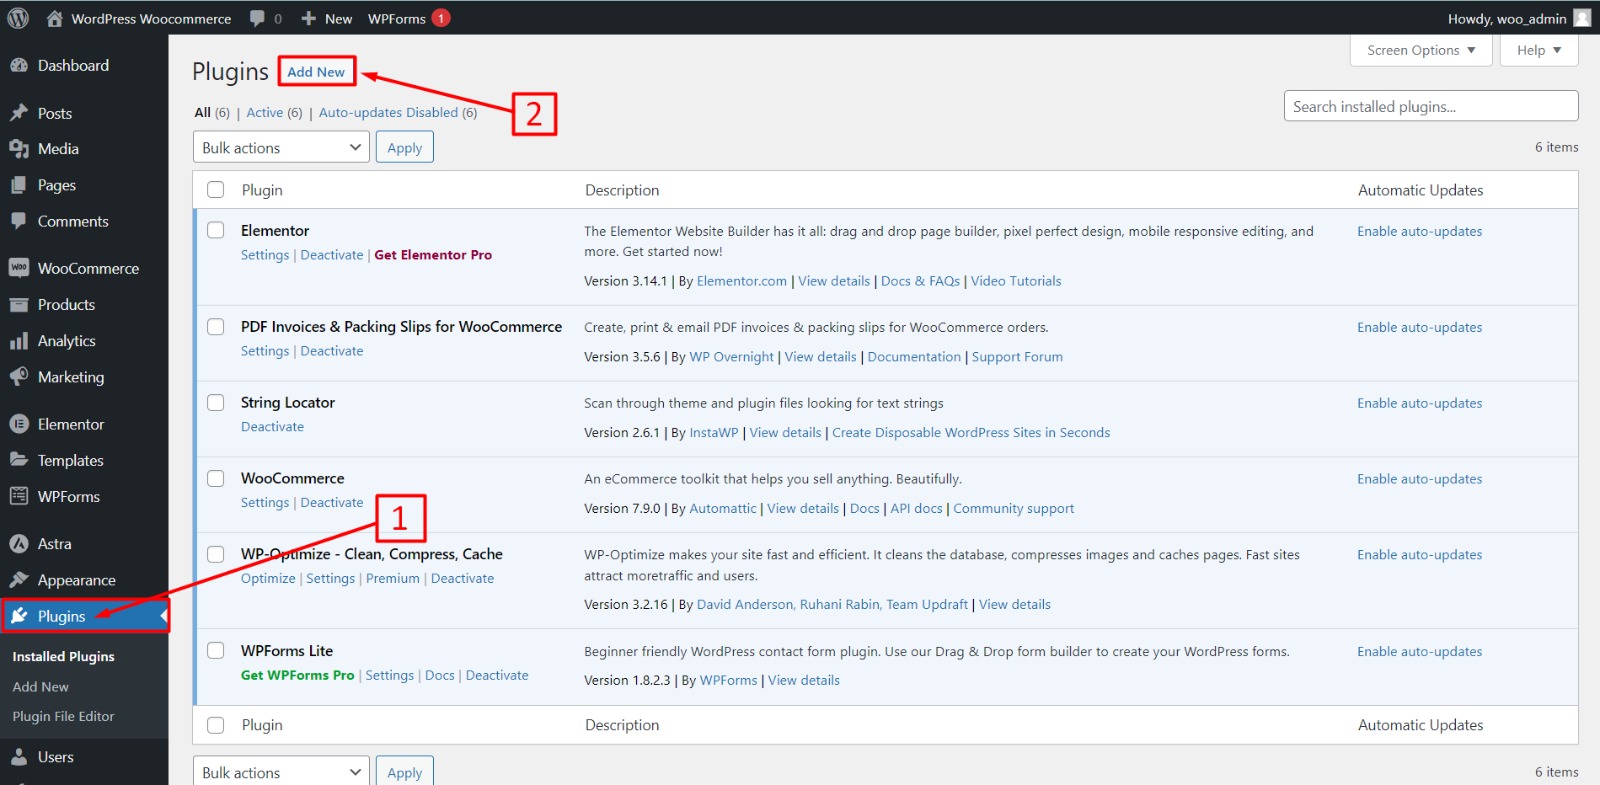
- Go to "Plugins" and select "Add New" from this section.
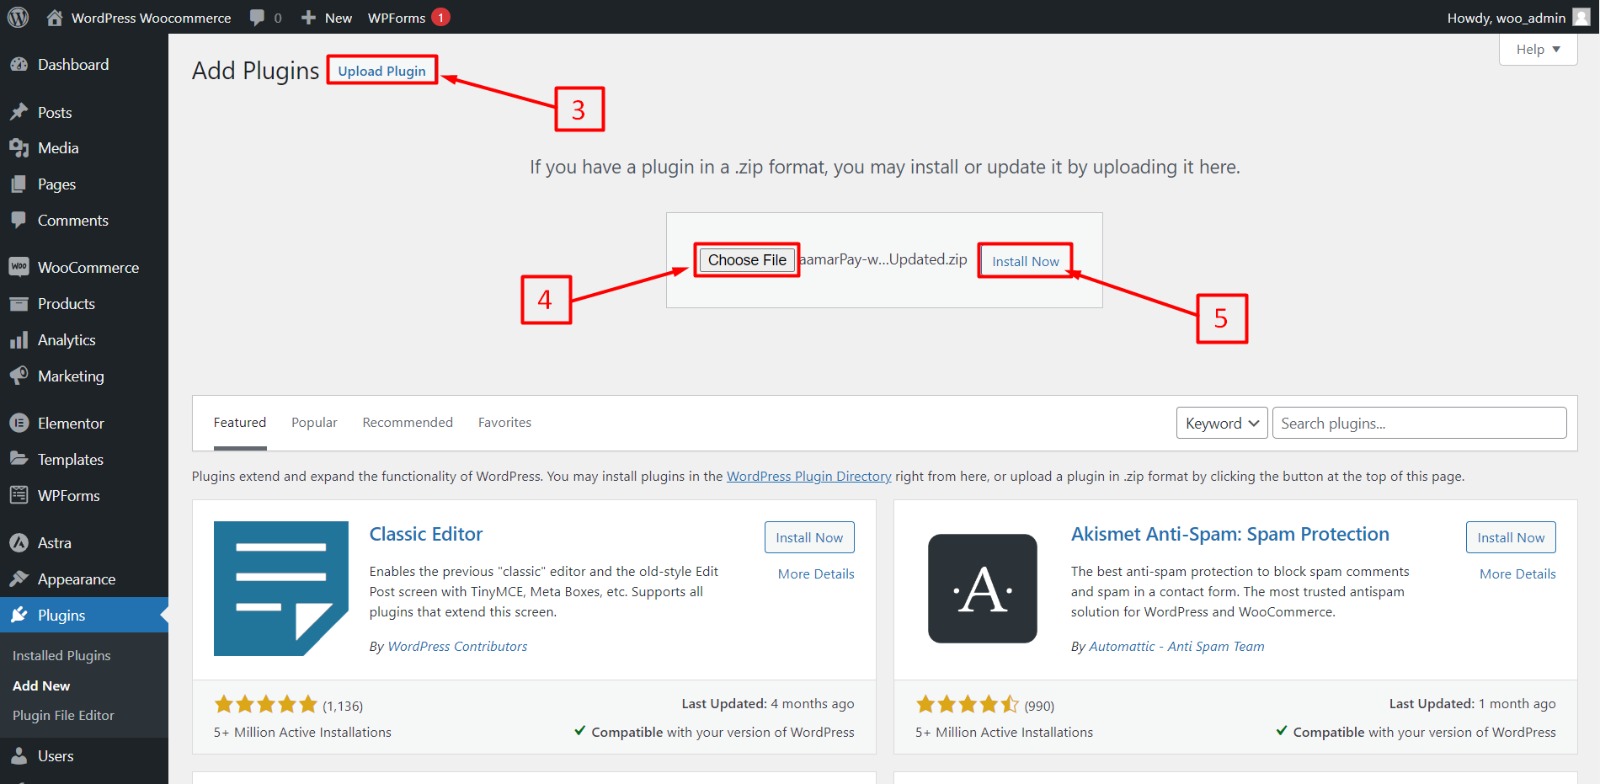
- Select "Upload Plugin" then "Choose File" from here upload the downloaded aamarpay payment plugin and click "Install Now" button.
Activation Steps
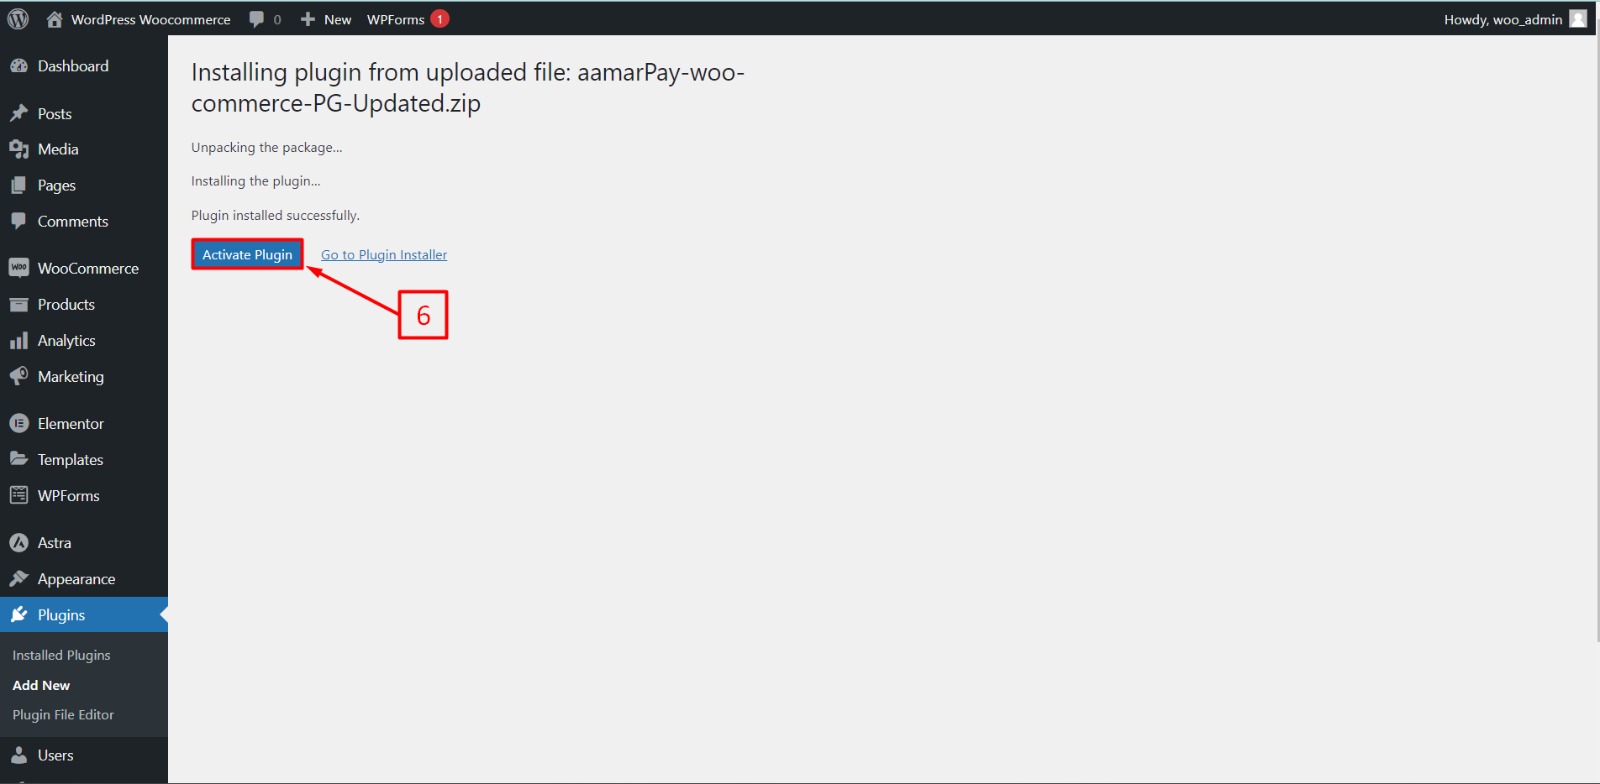
- Click the "Activate Plugin" button , the plugin will be activated.
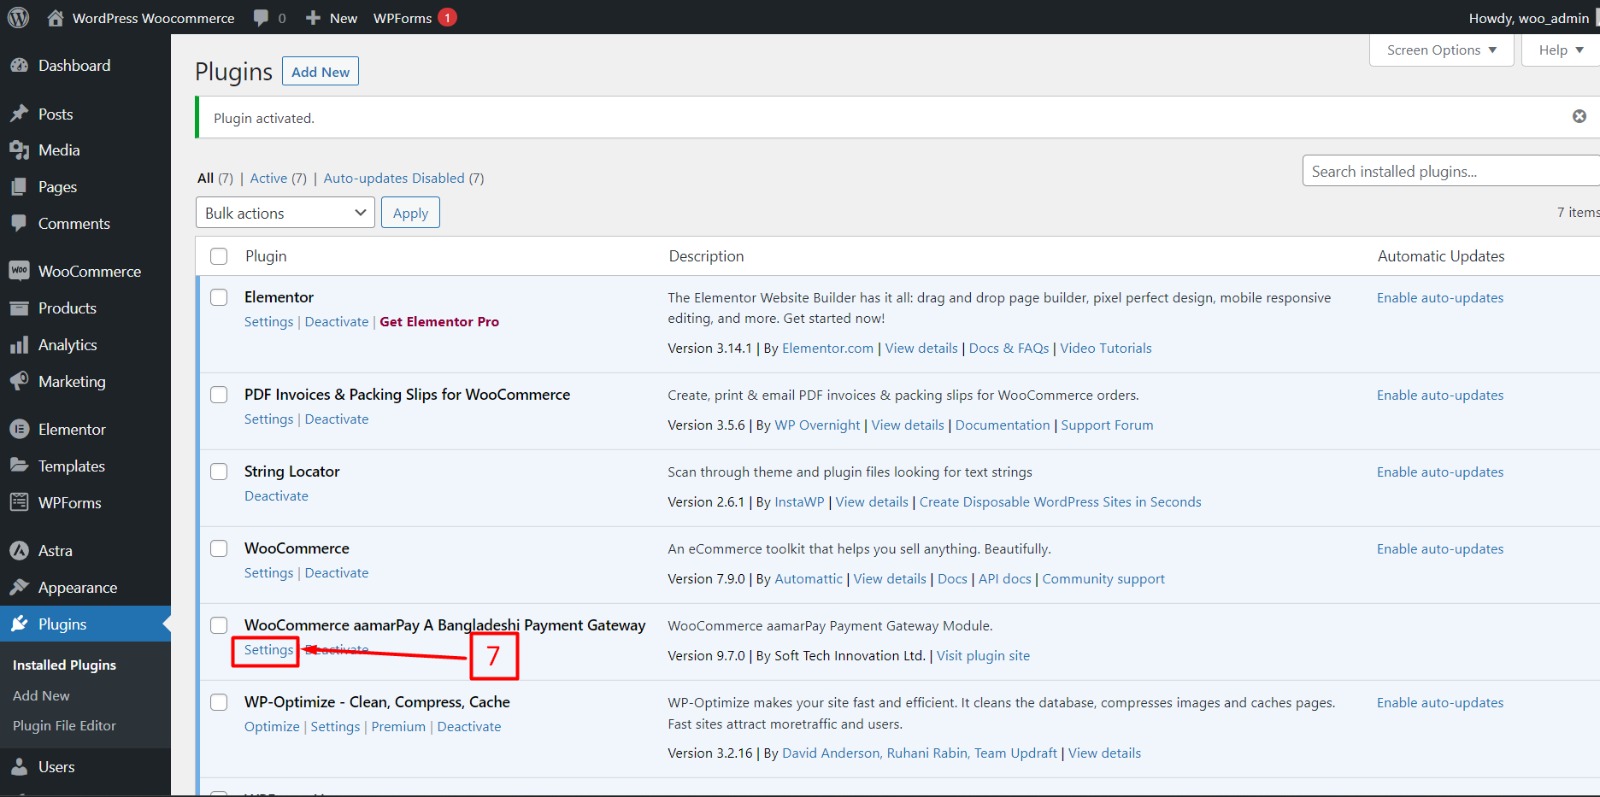
- Go to "Settings" section.
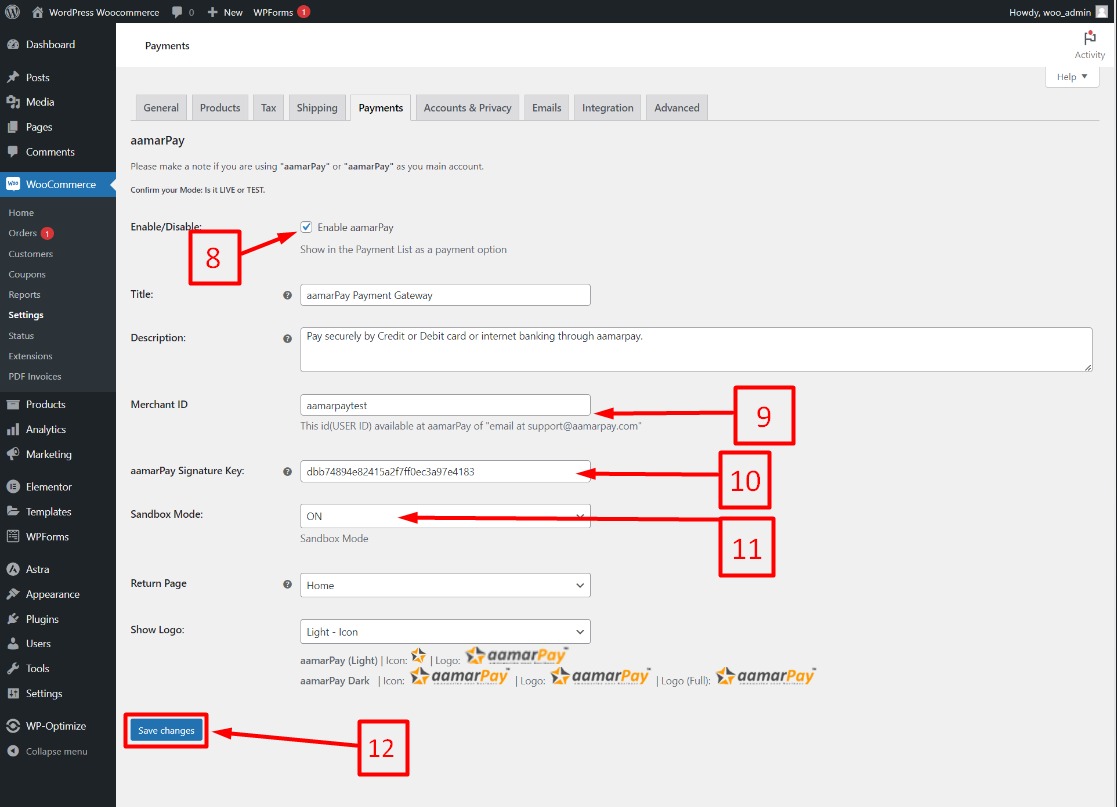
-
select the check box "Enable aamarPay"
-
In the same page, you will find the Merchant ID and Signature Key options.
Sandbox Environment
All operations conducted in this environment are considered as trial transaction.
Store ID : aamarpaytest
Signature Key : dbb74894e82415a2f7ff0ec3a97e4183
- To switch to live mode, enter your live Merchant ID and Signature key in the respective fields.
Obtain Live Credentials
For acquiring the necessary live credentials to process payments, please don't hesitate to contact our Support Team at [email protected]. They are readily available to guide you throughout the procedure and provide the essential credentials to facilitate live payment transactions on your platform.
-
Make sure to set the Sandbox mode option to "Off" for live transactions.
-
Save the configuration settings to apply the changes.
Congratulations! You have successfully installed and activated the aamarPay payment module for WooCommerce . Your customers can now make payments using the aamarPay payment gateway.
Please ensure that you have completed the necessary steps to enable aamarPay on your aamarPay account and obtained the required Store ID and Signature key before switching to live mode.
If you encounter any issues during the installation or configuration process, please reach out to integration support team for assistance.
